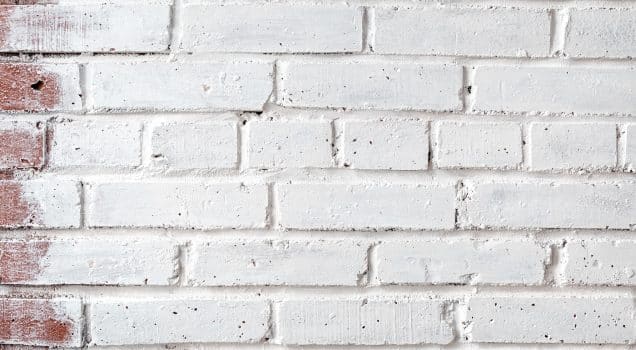
Planning to scrub and scrape paint off brick walls?
Spoiler alert! It probably won’t go according to plan because bricks are porous, and paint penetrates deep into the corners and crevices. In fact, soap and water won’t be enough to restore any painted brick wall to its original look.
With that being said, removing paint from brick calls for a more intensive strategy involving a commercial-grade paint stripper, among other things. Understandably, people get intimidated and end up hiring professionals to do the job.
Although it’s no easy feat, removing paint from brick can surely be done by any seasoned DIY-er at home. If you are up for the challenge, then set aside about four hours of three sessions each, and follow this step-by-step guide!
So, let’s get started, shall we?
Learn How to Remove Paint From Brick

Before we get into the nitty-gritty, there are a few things to keep in mind about removing paint from brick.
-
Choosing The Right Supplies
The most efficient way to remove paint from the surface and pores of your brick wall is to use a paint stripper. But, as you will realize soon enough, nothing comes easy with this job.
Most paint strippers in the market are caustic chemical-based solutions that do strip off paint, but they also leave the brick wall in a vulnerable condition. This rings true especially when you are dealing with an older wall.
With that being said, the safest way to remove paint from brick, with minimal damage, is to opt for a gel or paste-based compound. Also, avoid any paint stripper which has methylene chloride as an ingredient in the formula. Apart from being prone to dripping, methylene chloride is highly toxic.
-
Temperature
Exposed bricks do not do well in cold temperatures. Therefore, ensure that you begin work during warmer months – leaving at least three days for the restored bricks to bask under warm sunlight, and away from frost!
-
Preparing Your Work Surface
Prevention is better than cure – and prevention of a mess is better than cleaning up later!
Needless to say, laying down tarp under the brick wall that you will be working on is non-negotiable. Additionally, you should cover up doors and vents to trap the dust and debris within the room. Without a doubt, once you start work, paint flakes, products, dust, and debris will be flying everywhere!
-
Protective Gear
If you’re using a paint stripper, it’s highly recommended to be prepared with safety gear such as a face mask, safety goggles, full-sleeved clothing, and gloves for minimal contact. Moreover, paint strippers usually come with instructions and labels that specify the safety gear needed before beginning work.
-
Patch Testing
Any experienced DIY-er swears by this rule: Always test a small area before committing.
While not necessary, it is best to work on a small and discreet area like the corners of the wall to test the efficiency of your products. Moreover, it gives you an idea about how much time and product will be required to finish the entire project.
And, if all fails, you can still backtrack and hire a professional to help!

Step-By-Step Guide
Now that you have the basics down, it is time to start putting in the labor.
Step 1
Once your protective gear is on, start scraping away at the outermost layer of paint; you can use the back of a trowel to do this job. And, don’t worry about getting it all out. Focus more on peeling off paint that is already flaking.
Additionally, you can use sandpaper to make the brick wall smooth and ready for the next step.
Step 2
For this step, you need a gel or paste-based formula, commonly known as paint stripping gel. Alternatively, you can make your own paint stripping agent with Trisodium Phosphate Solution. Read on to know how you can use both Trisodium Phosphate and commercial paint stripping gel to remove paint.
-
Trisodium Phosphate Solution
To do this, get a clean container and mix the solution with warm water; as a rule of thumb, half a cup of Trisodium Phosphate Solution is enough for about one gallon of water. Once you have mixed the solution until it is fully dissolved, start brushing the compound onto the brick wall. Make sure that the paste gets into all the nooks and crannies for optimum results.
Next, wait for about 10 minutes before you return to the work area. Once the compound has cured for 10 minutes, start scraping off the paste along with the paint that has bonded to it. Repeat this step until all of the paint comes off. While this method is great for removing thin layers of paint, you may have to work with paint stripping gel for thicker and stubborn paint jobs.
-
Gel-based Paint Stripper
On the other hand, if you do decide to use a paint stripping gel, then go ahead and apply it onto the entire wall, paying extra attention to get it inside the crevices.
With the brick walls thoroughly covered with layers of the product, you can start applying fabric peeling strips. Slowly and carefully place each strip on the wall and press hard, making sure that it is attached to the gel.
Overlap the peeling strips until the wall has been covered entirely. Next, read the instruction label and leave the strips to cure during the stipulated time. Generally, letting it rest for 24 hours does the job remarkably well.
Once the peeling strips have cured for a sufficient amount of time, start peeling them off gently. Pulling back too fast may leave paint behind or result in ripped pieces.
At the same time, slowly and steadily pulling it off will leave you with layers of paint visibly stuck to each strip. Continue this process until the entire wall has been peeled.
Step 3
For any remaining traces of compound or paint, use a trowel or stiff brush to scrub them out. If this doesn’t cut it, then consider spot treatment with a paint remover.
Additionally, you can rinse stubborn areas with water and apply scouring powder. Once done, scrub these areas vigorously until the paint comes off. While staying positive is key throughout this grueling project, be ready to redo a few steps to achieve your goal.
Step 4
Hose down the wall with water to remove any remaining compounds or flakes of paint. Moreover, make sure to dispose of peeling strips correctly. Although these may not be as toxic as caustic chemical-based solutions, some of them still need to be neutralized before going into the bin.
And, once the wall is dry, you can choose to give it another rinse with water to remove the last stubborn remnants of paste or paints.
Step 5
And, finally, we have come to the end of this labor-intensive project. Let the walls dry for about a day or two and you can finally seal it and paint it with a fresh and new batch! Or, just leave it in its original splendor – the choice is yours. After all, you have earned it!

Frequently Asked Questions
-
Can painted bricks be restored?
Painted bricks can definitely be restored. However, the process is tiring and time-consuming. While some people prefer to hire professionals for the job, you can do it by yourself with the right tools and plenty of time.
-
Are paint strippers toxic?
Earlier, the most commonly used formula for removing paint from bricks were caustic chemical-based solutions. However, most of these have methylene chloride as an ingredient, which is a highly toxic chemical. More recently, there are friendlier solutions available such as gel-based paint strippers and Trisodium Phosphate Solution (TPS).
-
Should I hire a professional for removing paint from my brick walls?
Hiring a professional comes with its own positives, however, removing paint from bricks by yourself is not impossible. But, to be on the safer side, it is recommended that you start with a small test patch to check whether the paint is not hiding any imperfections underneath. Contact a professional if you run into problems with the test patch, or if the original wall looks damaged.
-
At what temperature should I consider removing paint off bricks?
It is advisable to remove paint from bricks during warm seasons. As a rule of thumb, start working on removing paint from bricks at least a month before temperatures are forecasted to go under 40 degrees Fahrenheit. This gives the exposed bricks enough time to dry without the risk of frost damaging them.

Final Words
Brick – exposed or painted – elevates the coziness factor in any home.
However, styles evolve, and tastes change. One day you may want a classic red-brick style home that is reminiscent of Gothic architecture. On other days, you want white brick walls that will take you back to Santorini.
Nevertheless, having brick walls and knack for interior design at the same time equates to the intensive labor of removing paint from bricks every once in a while. Having said that, there’s no reason to hire a professional every time you are in the mood for change.
Follow this guide, and with a little bit of practice, you will soon perfect the notoriously tricky art of removing paint from bricks.
Till next time!
Related Articles
How To Paint Without Leaving Brush Strokes
How To Paint Aluminum [Step by Step]
10 Best Paint Primer For Drywall
How Long Should Primer Dry Before Painting
10 How to Remove Spray Paint from Concrete
How To Remove Spray Paint From Plastic
How Much Does It Cost To Paint A Car?
9 Best Paint Roller To Hide Paint Defects
7 Best Paint Brushes For Trim [Review & Buyer’s Guide]
7 Best Primers To Cover Dark Paint
13 Best Professional Airless Paint Sprayer
How Much Does A Maaco Paint Job Cost?
The 7 Best Paint Sprayers for Chalk Paint
13 Best Air Compressors | Buyer’s Guide and Reviews
Paint Sprayer Vs. Roller [All You Need to Know]
Learn How to Remove Paint From Brick
13 Best Automotive Paint Gun for Beginner
7 Best Paint Stripper For Metal [Tested]
9 Best Paint Brush For Polyurethane
7 Best Primers For Covering Red Paint


